|
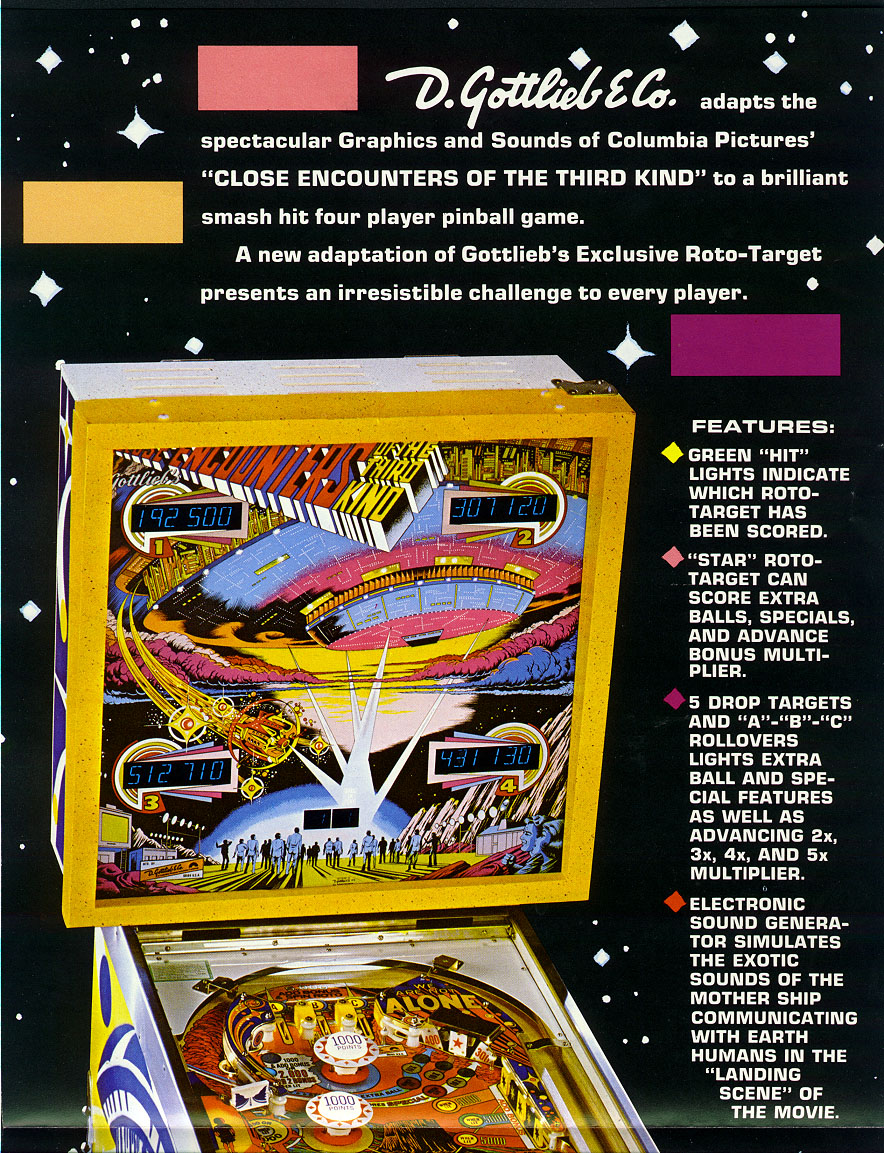
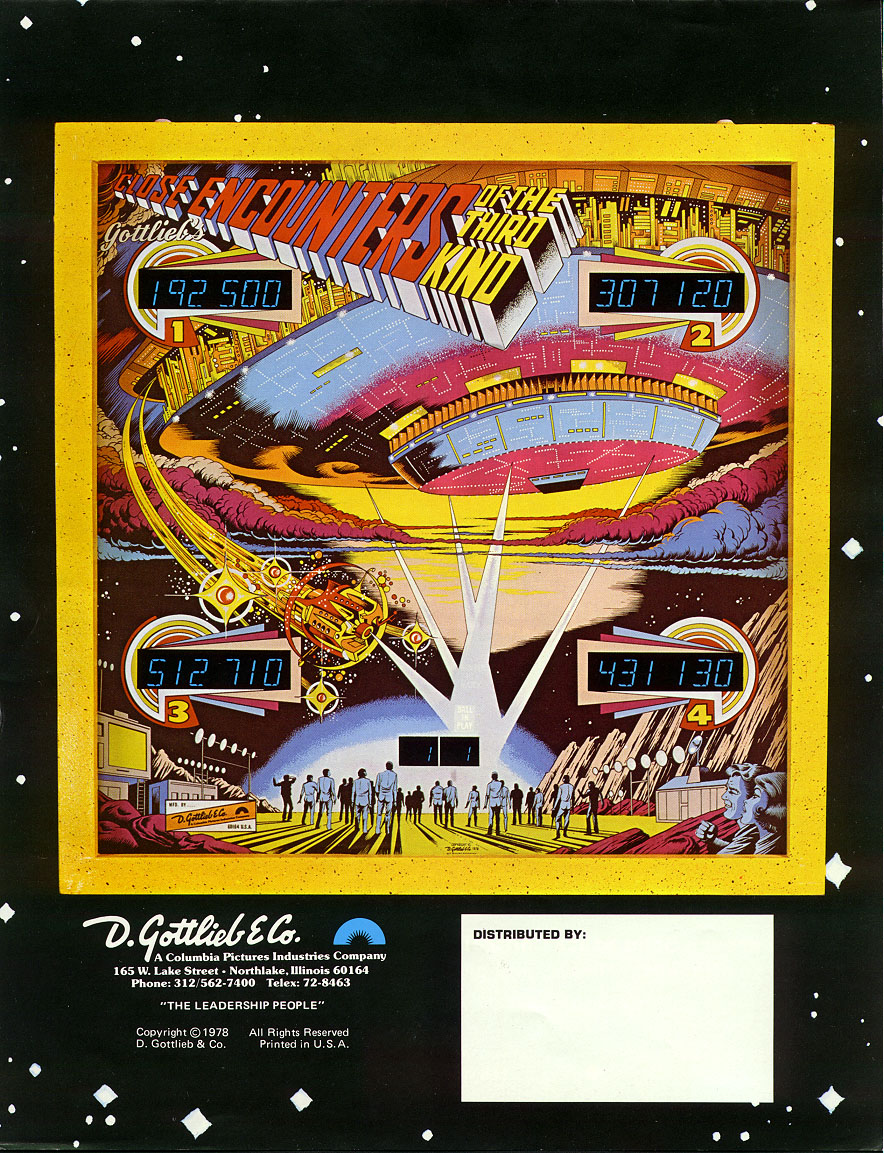
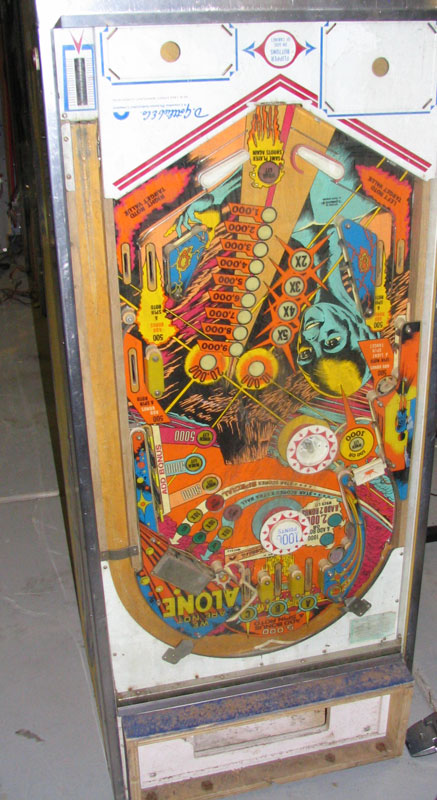
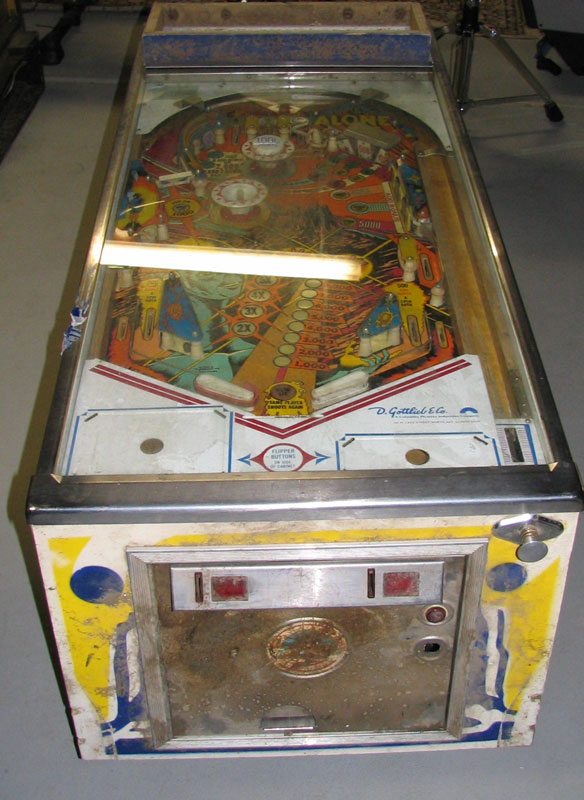
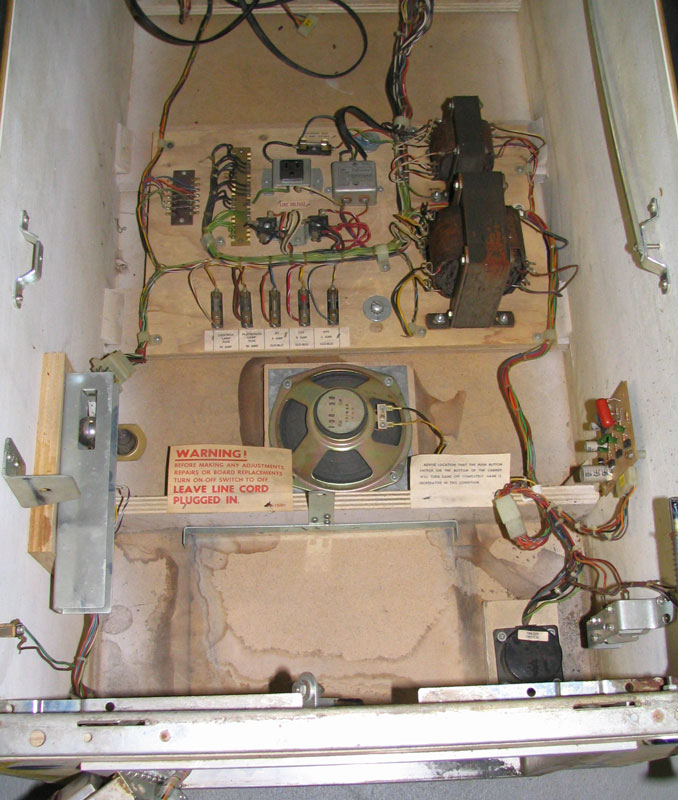
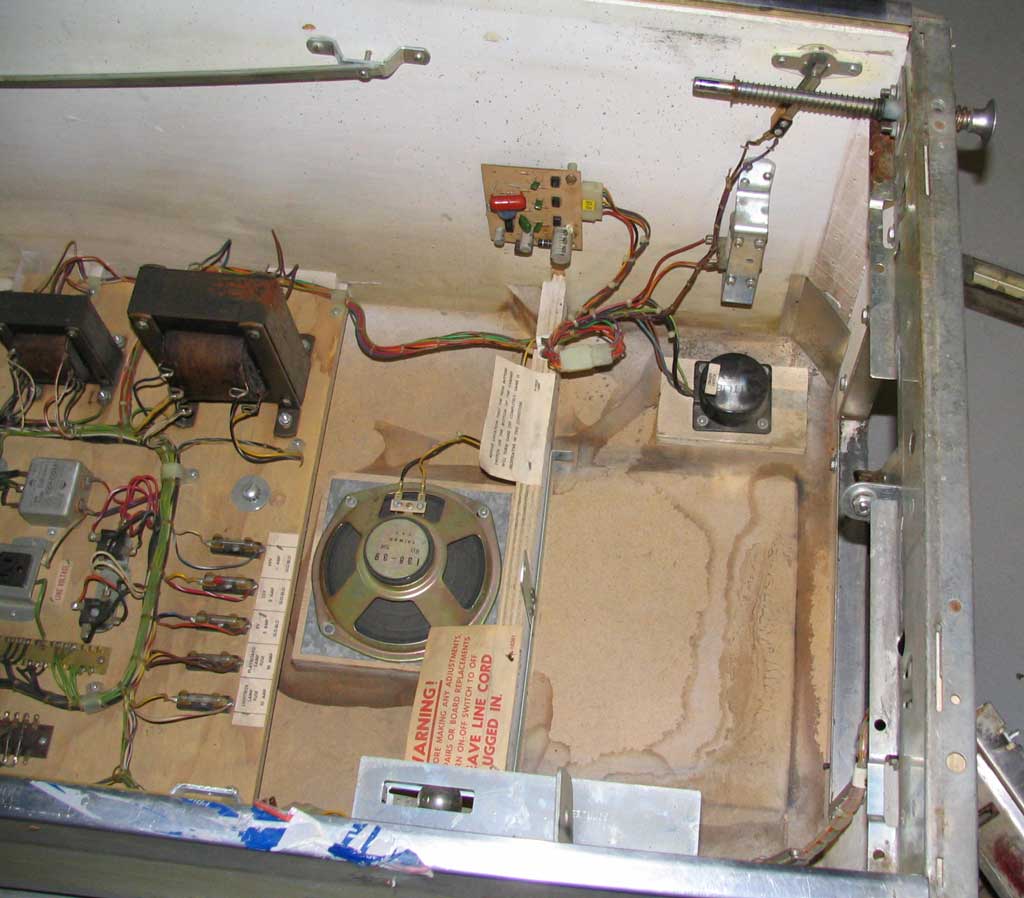
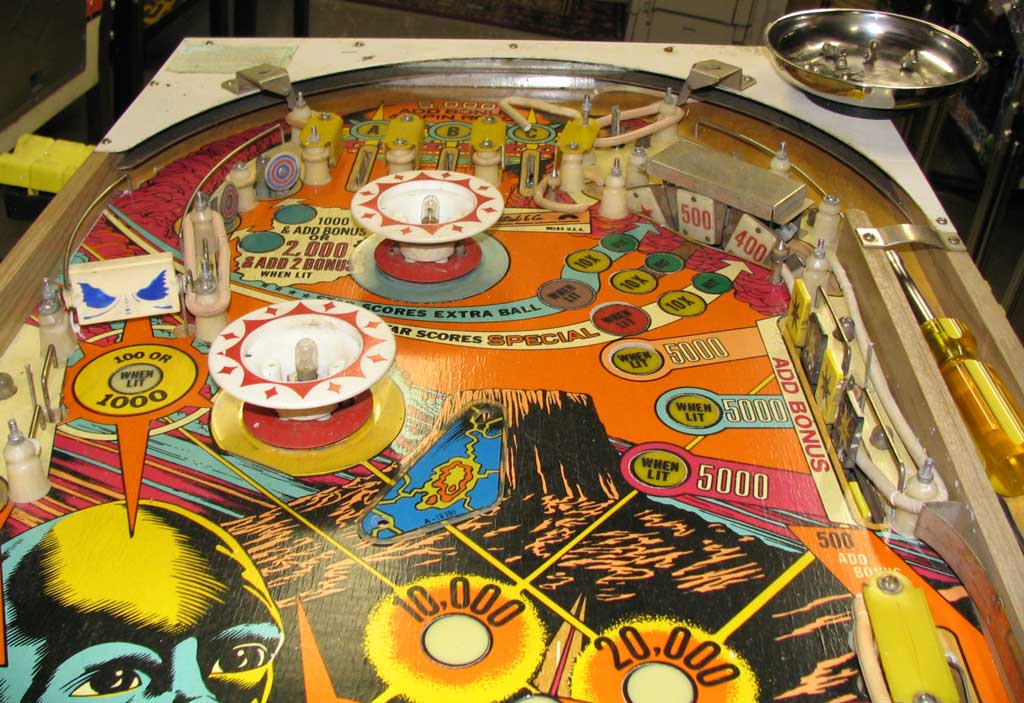
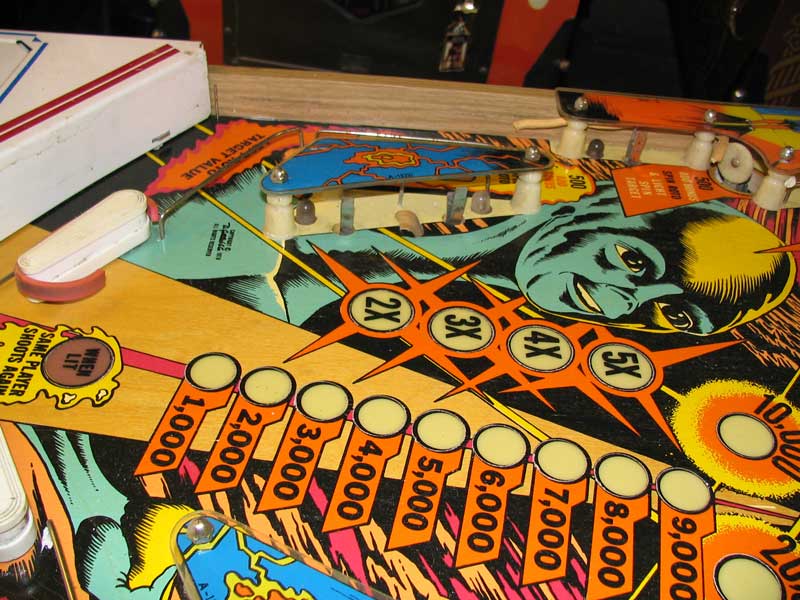
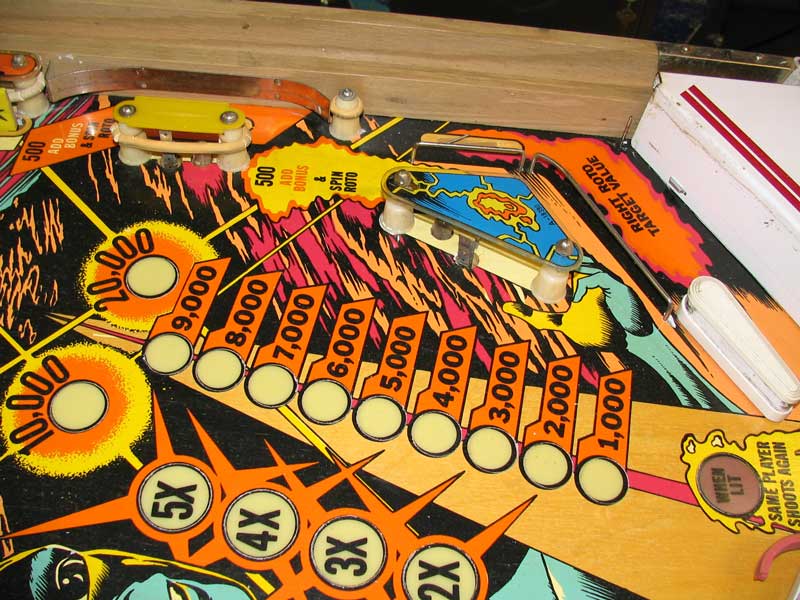
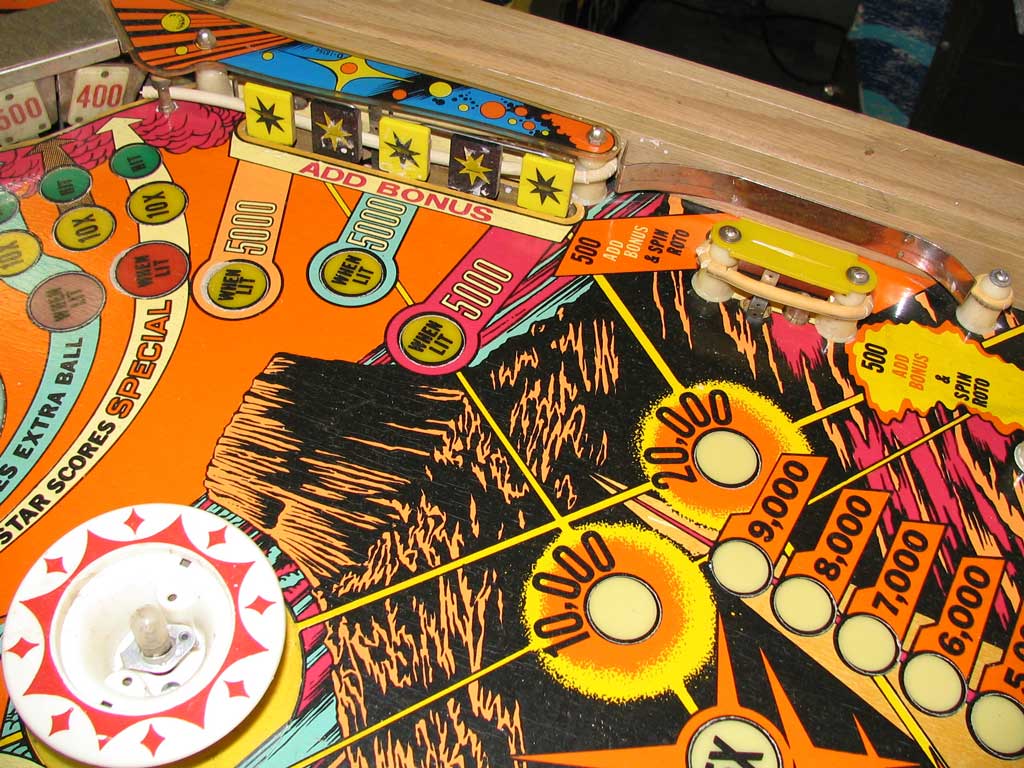
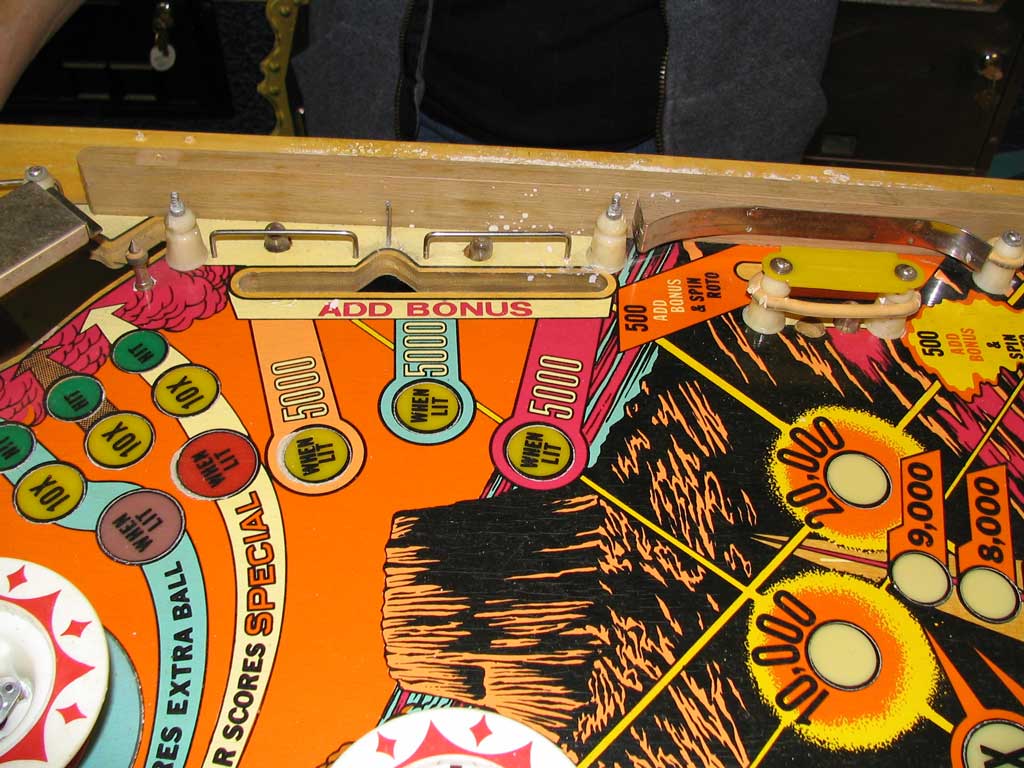
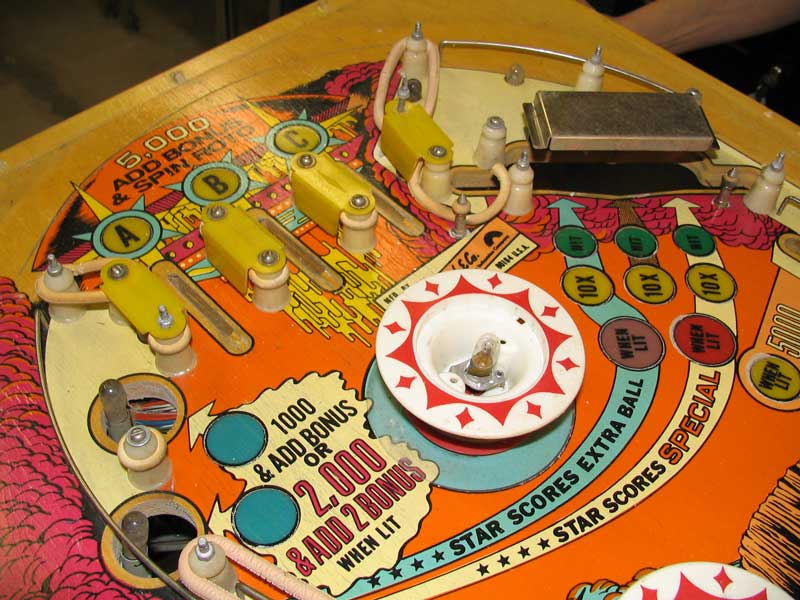
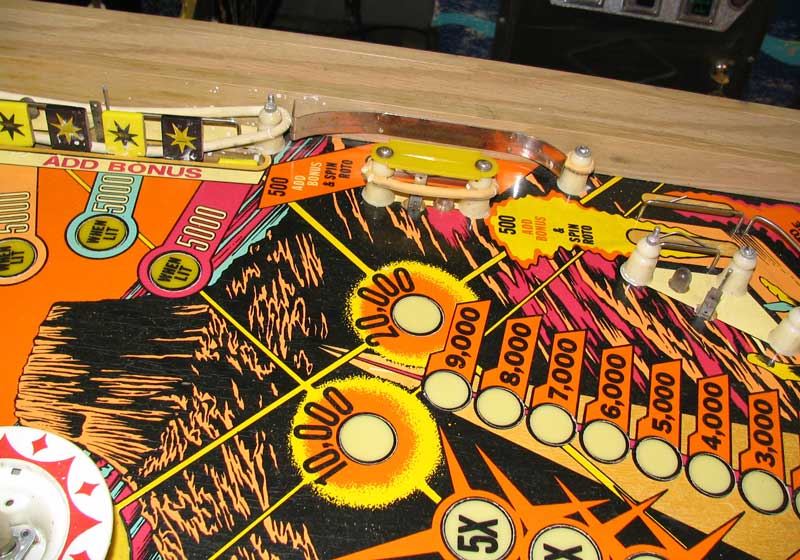
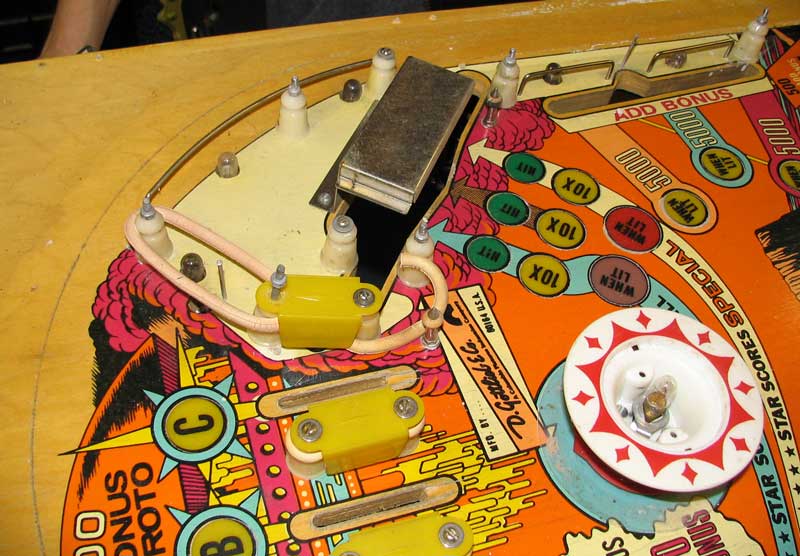
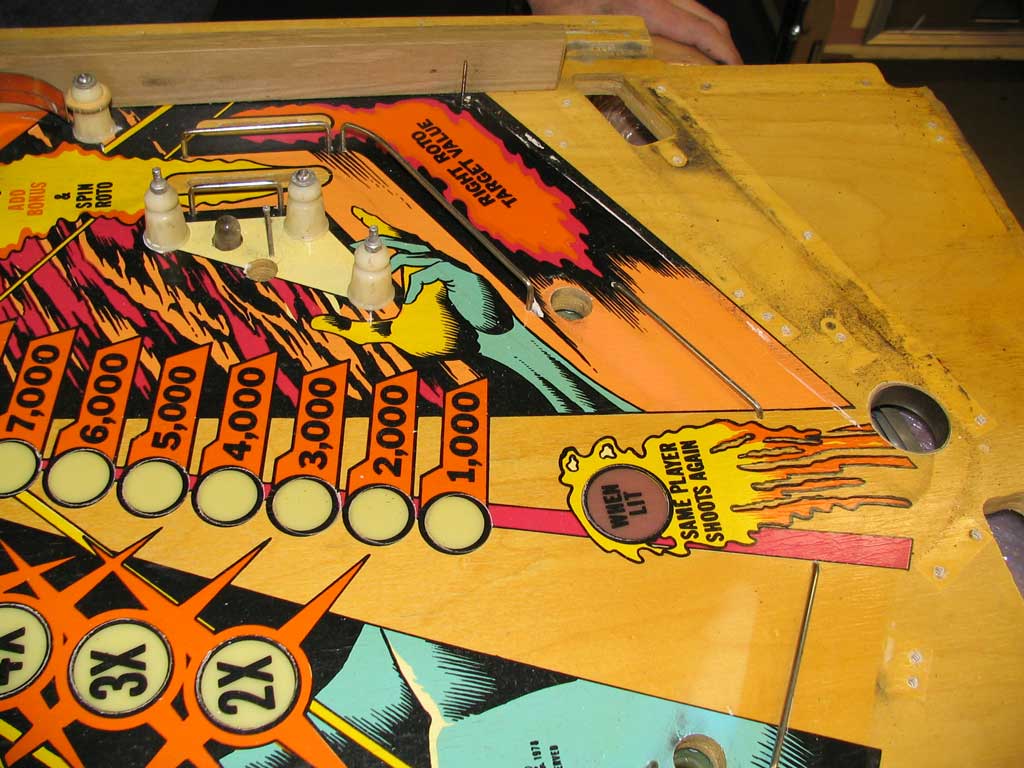
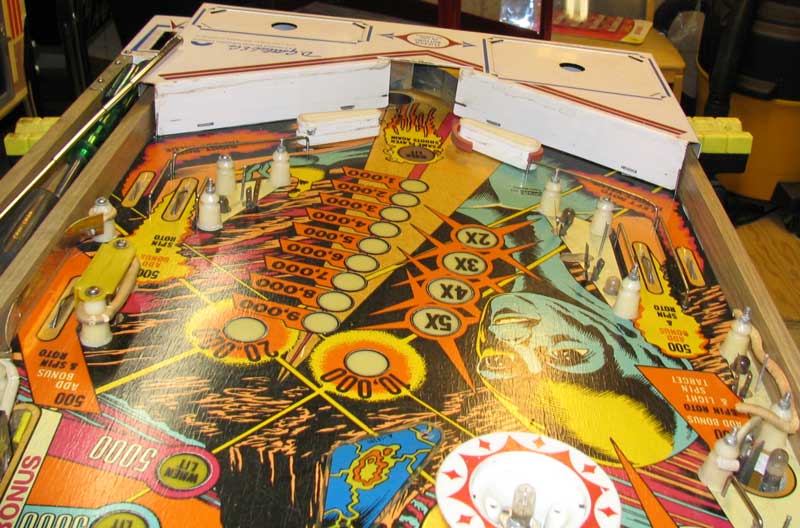
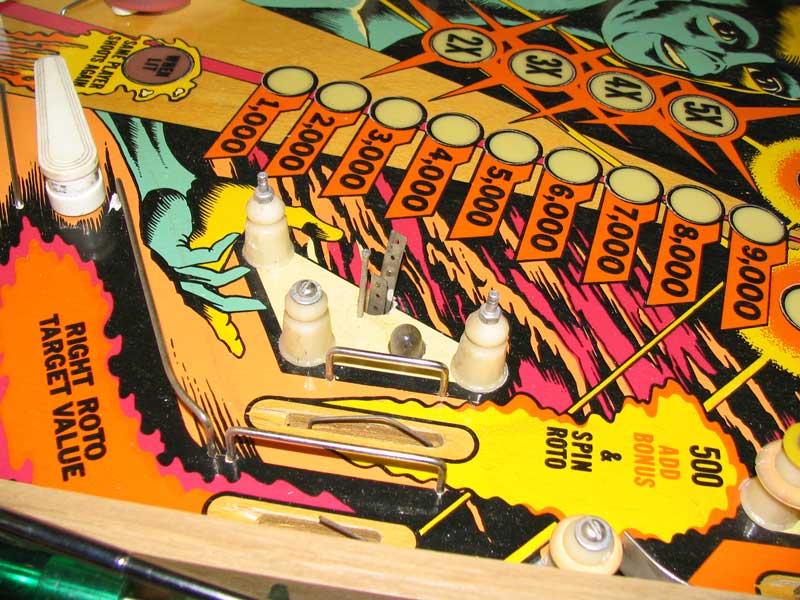
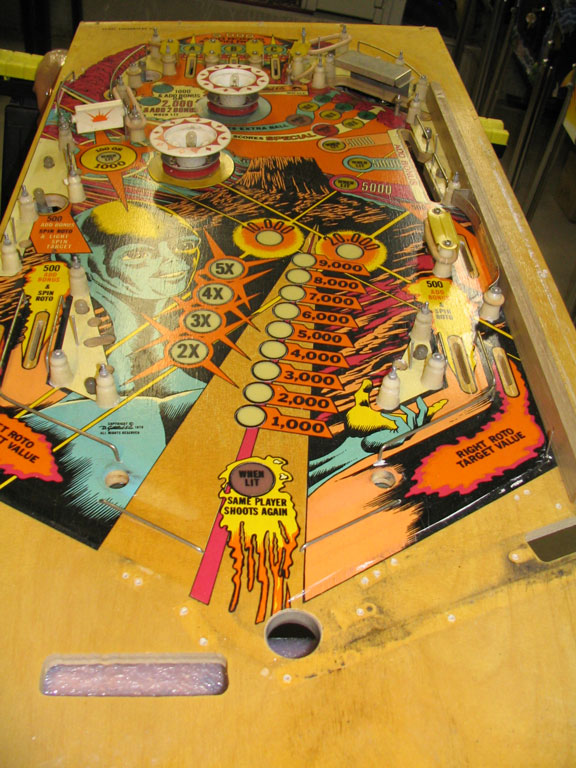
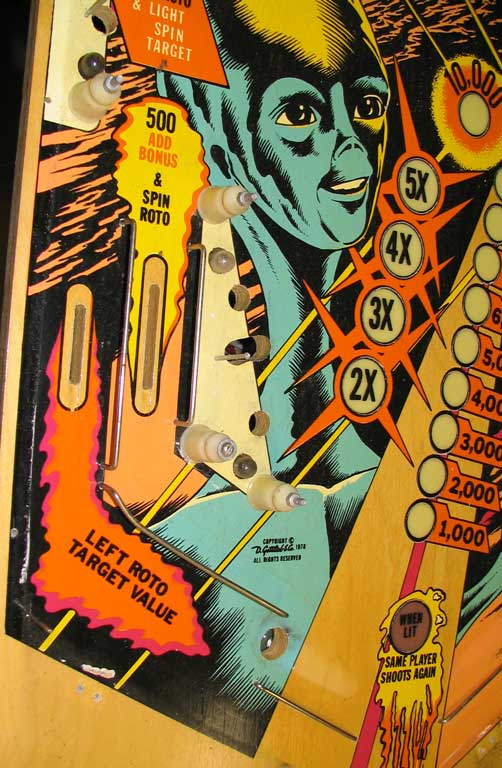
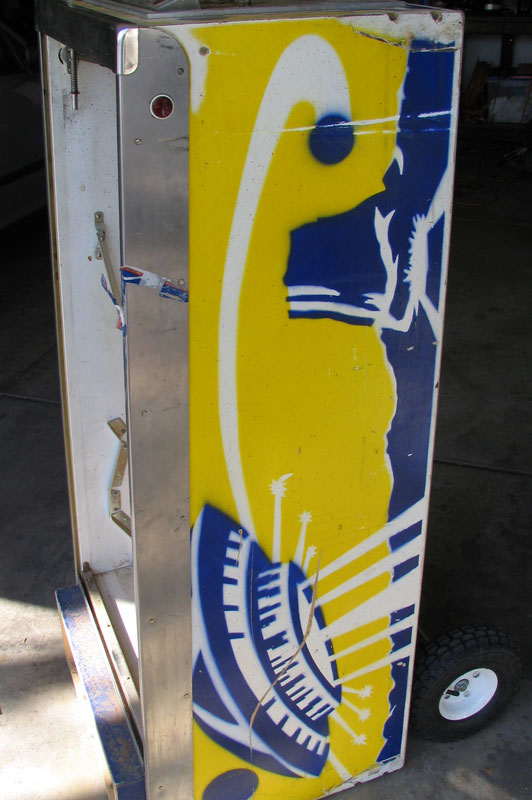
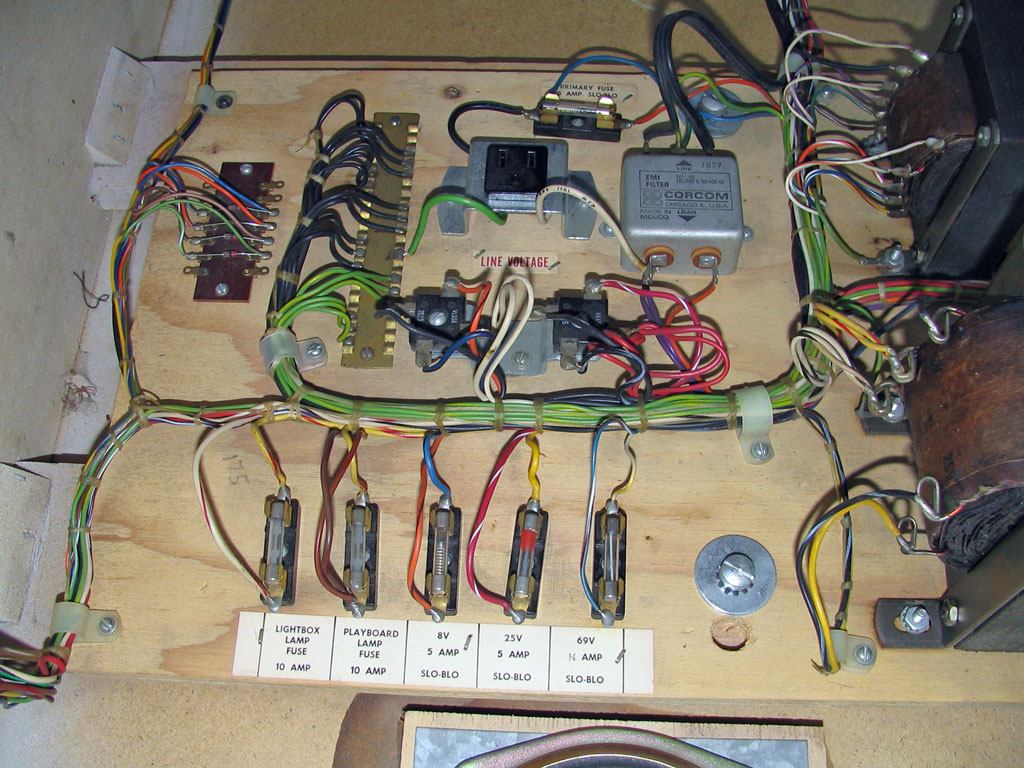
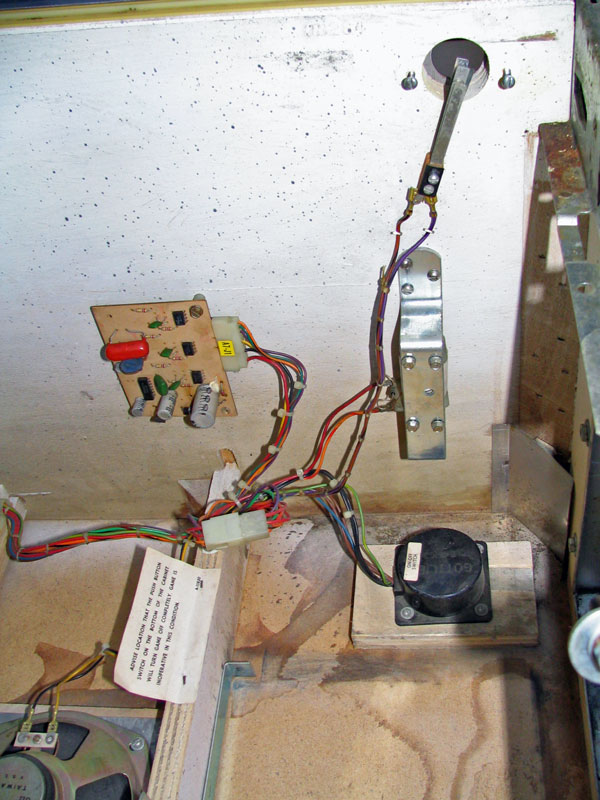
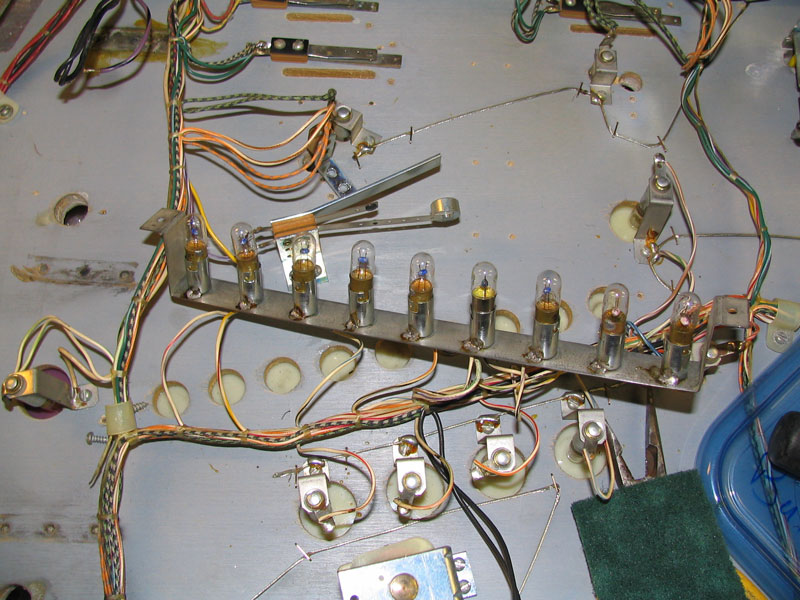
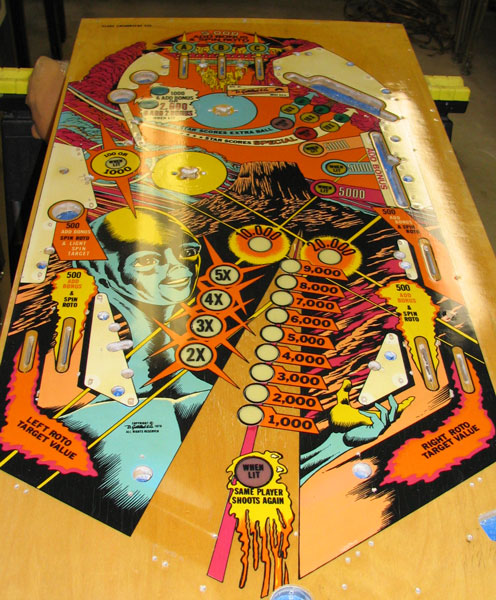
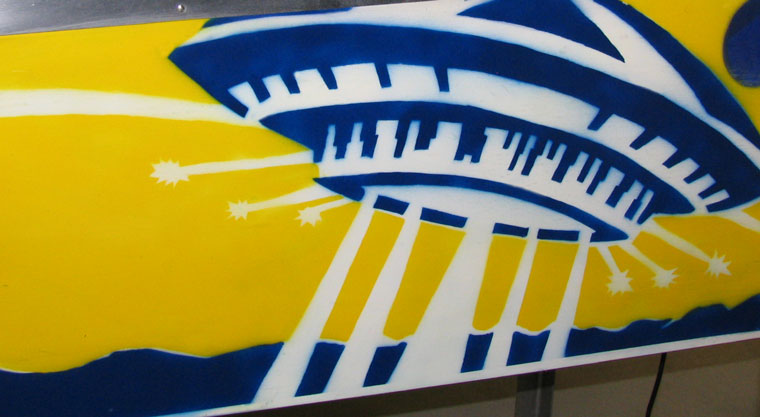
Close Encounters is a System 1 game made by Gottlieb in October of 1978. It's estimated that about 9,950 Close Encounters games were manufactured. The game features 2 flippers, 2 pop bumpers, one 5-bank drop target on the right side of the playfield, a spinner, and a roto-target on the upper right side of the playfield. The game features an electronic sound card for mimicking chimes, but a chime unit could be put in the game if desired (I'll leave it as original). Cost - A good project game price.I bought my game from Dan, who has sold me a few games recently (early 2008). Thanks again Dan! I also bought a Supersonic while I was at his house which included a spare playfield with virtually no wear and somewhat populated. I'm always happy with the deals with Dan. FadeThe game box is in pretty good condition and the playfield appears to be in good shape with minimal touchups needed. As far as fade goes, I don't really see any although there is somewhat of a discoloration where the left flipper rests which looks like a lighter color of wood than the rest of the wood where there isn't any artwork. Flaking ArtworkThe game has a decent backglass, but there is flaking here and there, especially around the title of the game at the top of the backglass. I shot it with some triple thick to stop flaking from getting any worse. Corrosion and RustNo corrosion and rust this time. What a relief. BackboxThe back box is solid with no problems that I can see. CabinetThe cabinet had a very deep and long gouge on the left side, with smaller gouges on the right side but that were longer. I'll fix this up with Bondo and make blue and yellow stencils for covering the gouged area. PlayfieldThe playfield doesn't have much wear on it, mostly around the pop bumpers and by the drop target bank on the right side of the playfield. When you buy these older Gottlieb games that come with a non-sticky mylar "platter" under the pop bumper, you'll usually find that dirt has gotten under the mylar and it wears away the artwork until the bare wood is showing. I hate those non-sticky mylars, I've never seen them add any value at all! One thing I noticed after cleaning up the playfield and using Magic Eraser with alcohol to get any ball swirls out (not many), is that the artwork has somewhat of an "alligator" look and feel to it. This is probably caused by changing weather conditions creating expansion and contraction which affected the clear coat surface that was originally applied to the playfield. I plan to clear coat the playfield to cover up the alligator texture and make the playfield a little smoother. If I don't do this, I'm suspicious that after restoring and reassembling the game, the ball rolling over the playfield will cause wear marks to show up. The only reason the wear probably doesn't exist right now is that the game didn't originally have the alligator texture and the change showed up when the game was in storage for a number of years. Tear-downIt took me one hour with the help of my wife Chris to completely tear the playfield down. The clock started when we slid the playfield glass off and continued through the process of taking digital pictures while removing parts at various stages. All the parts appear to be good and there's no rust or corrosion on anything. I used to put every part in its own baggie, but for the last 8 games or so (February 2008) I throw everything in a magnetic bowl and don't worry about it. After doing a number of these games I've found that there are only so many places a particular screw type could go. After awhile, you get the hang of what each vendor used to hold playfield parts. The only thing that bites me now and then is when I don't pay attention to plastic posts that have varying heights. This can be overcome by taking a digital picture and laying a ruler next to the post to indicate its height. ElectronicsI had to add a Ni-Wumpf card for the main MPU board since the original boards are often bad and is usually what caused the game to move in to retirement. When I first got the game it was missing the MPU, power supply, and driver boards, but Dan gave me some others to try. I'll be very surprised if the original MPU works, the rest I can fix. DisplaysReplaced the shot displays with some newer ones that I was able to recharge thanks to Dan having a box of old displays. Game CardsPeter at Inkochnito's has some card scans that I used to make colored game cards that match the color theme. ConclusionFor $200 as an initial outlay, the game was a fairly easy game to tear down and rebuild. I ended up buying another Ni-wumpf CPU board for the game ($180 for the Ni-wumpf) since at the time, I couldn't get an original board to work. Later, I bought five original CPU boards and managed to get two of them to work after replacing some chips. I couldn't find a PROM chip for the game so I decided to burn an EPROM with the Close Encounters game code and create an "adapter" that went between the newer EPROM chip and the original PROM socket. You can read more about what I did here since this is a viable way to replace a System 1 game's original PROM which has a tendency to get hot. Although I got an original board to work just fine, I put the Ni-wumpf back in the game so that I can use an original board on other System 1 games. I used Bondo and some glazing putty to fill in the gouges followed by sanding with a wet/dry 600 grit paper. This meant that the artwork was removed so I created two stencils (one for the blue color, the other for the yellow color) and shot some white paint on the areas where the Bondo and glazing putty were used. Then I followed up with yellow and its stencil, and then blue with its stencil. The stencils were made using a 25 watt soldering iron with a fine pointed tip and some large sheets of mylar I bought. I used an airbrush to paint the colors with the stencils and then after drying, I used Krylon Crystal Clear to cover the paint job so the acrylic paints I used wouldn't rub off. I used two colors of acrylic paint found in small bottles like you can buy at Michael's hobby store without having to mix the colors. The colors matched perfectly with the existing colors. All I had to do was cut the acrylic paint with water when using the airbrush. After cleaning the playfield with Magic Eraser and then some Novus to get an idea of how it would look when polished, I decided that something had to be done about the alligator effect. So I sprayed three coats of Varathane on the playfield using a high volume low pressure (HVLP) sprayer. This made the playfield look much brighter and hid the alligator effect that was evident without the clear coats. People that have seen the playfield say it looks like new. I also did a lot of cleaning on the roto target, added new drop targets, new posts, a flipper rebuild kit, tumbler-polished all metal parts, buffed larger metal parts using a Jet buffing wheel with white rouge, and added new plastics that I bought from Pinball Resource. Close Encounters of the Third Kind is a very fun and addictive game. I would call it somewhat of a "sleeper" of the System 1 games. Many friends play the game and find themselves saying "just one more" as they play again and again. It still holds our interest and I've found that my wife and I play the game maybe 4 times per week on a regular basis since it can be frustrating to beat. This is after having it in play for almost a year now (written in late July of 2009). (click any picture to enlarge)
|