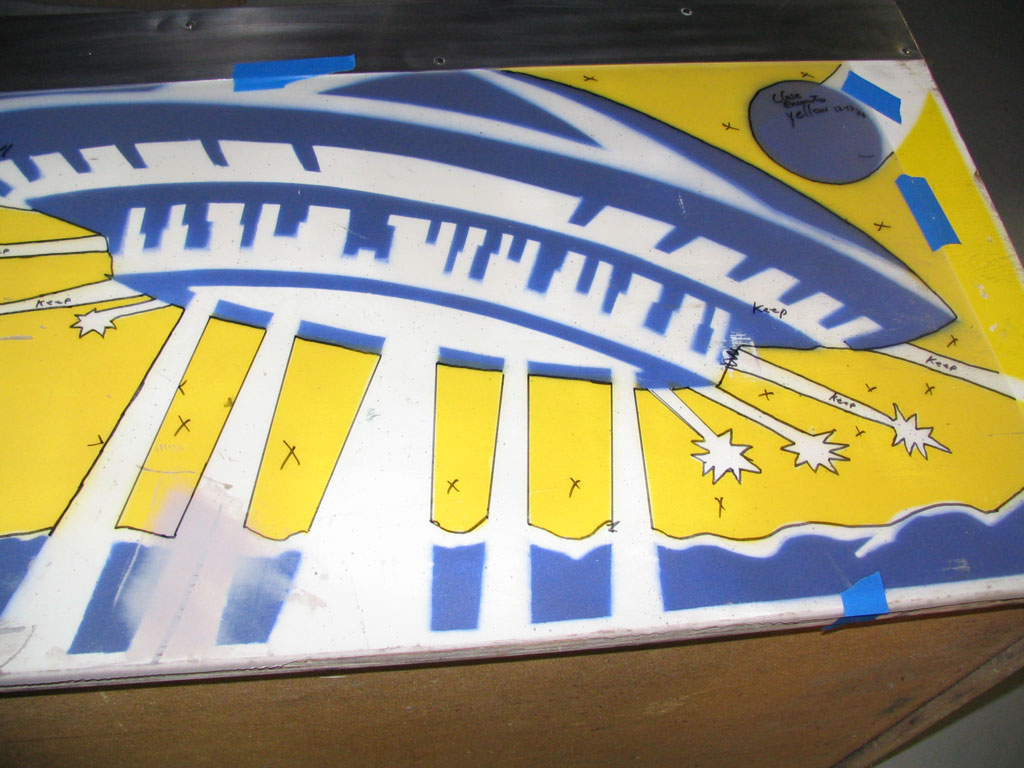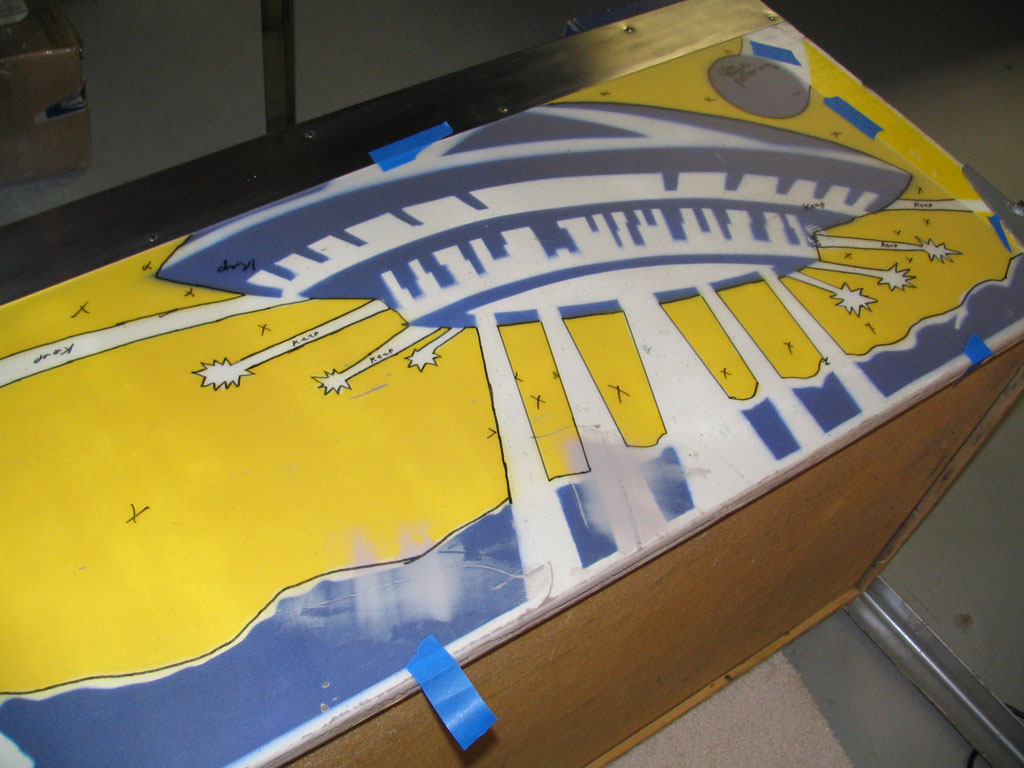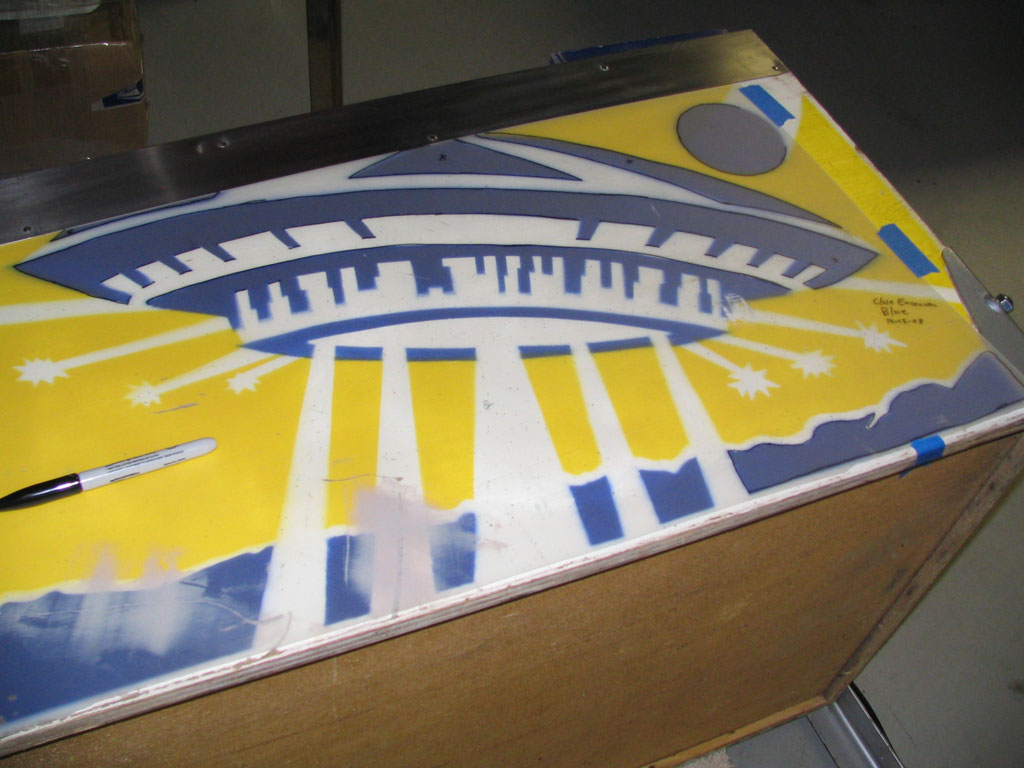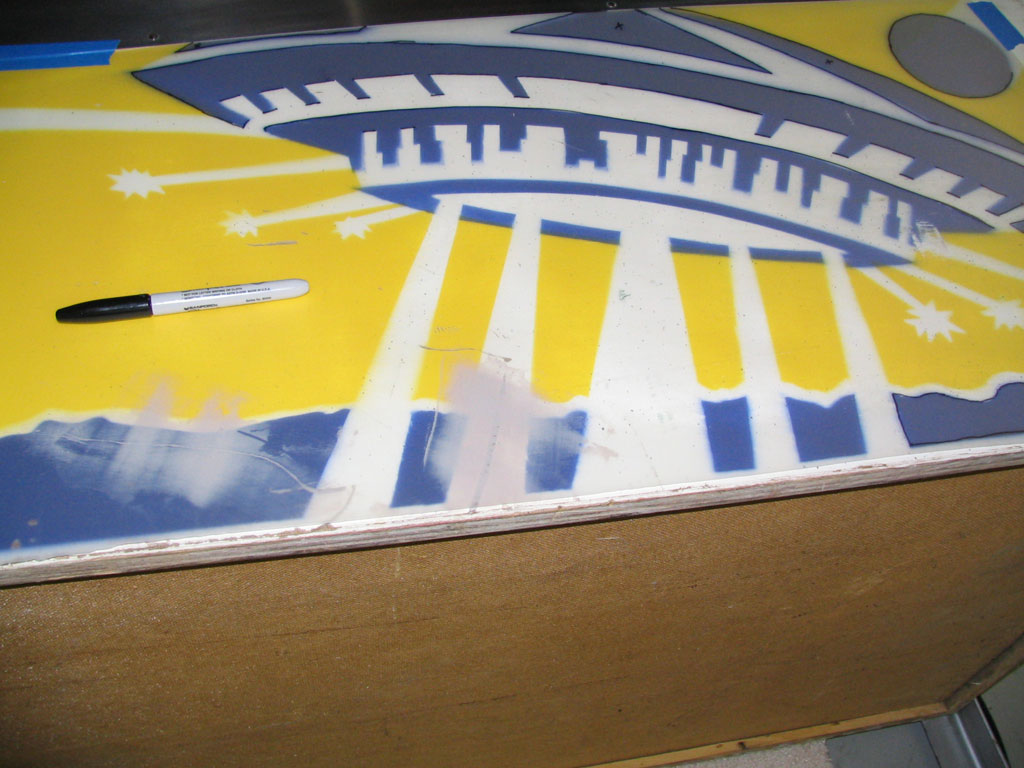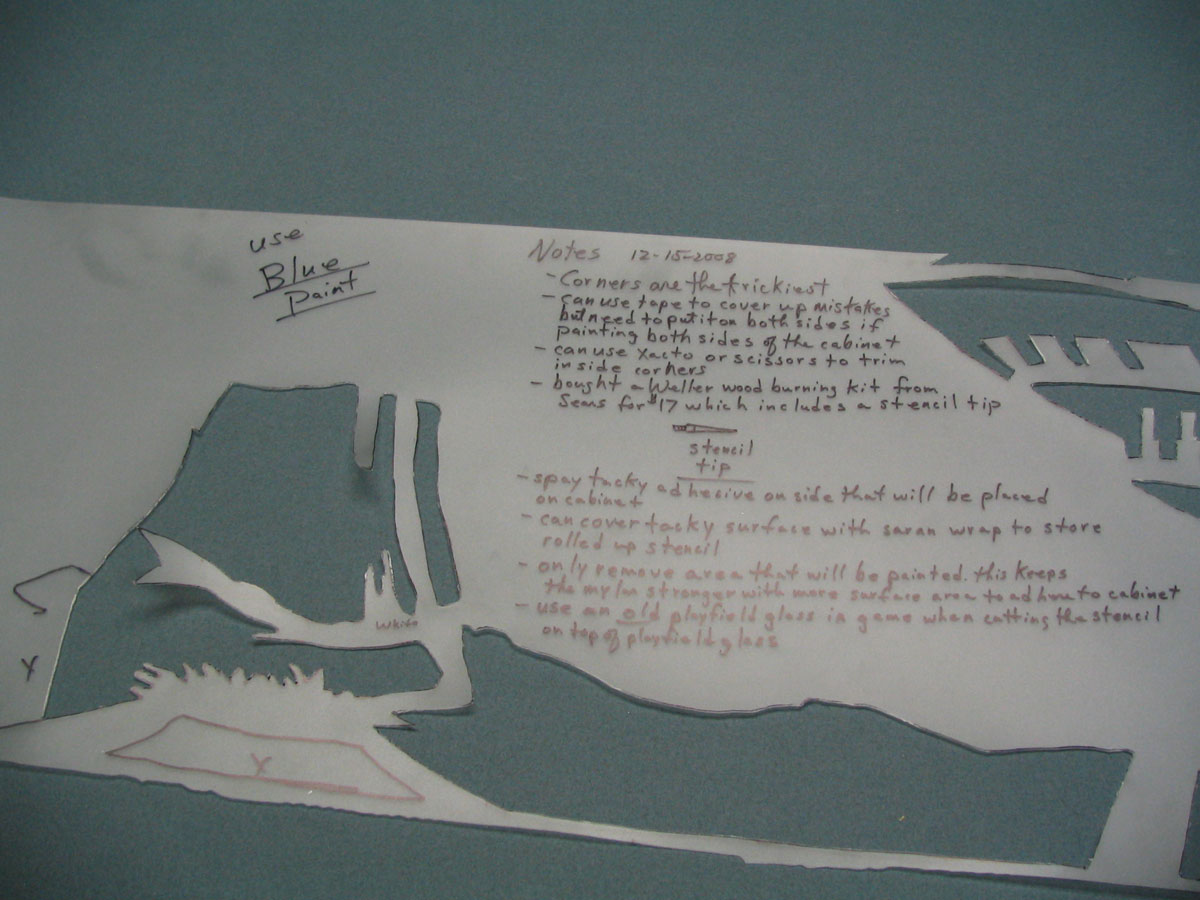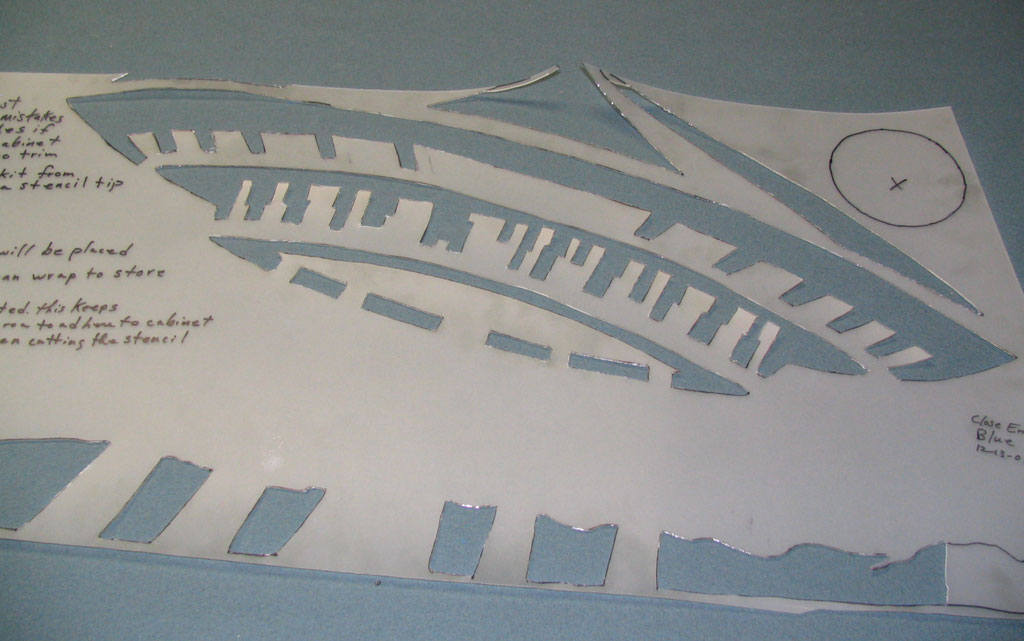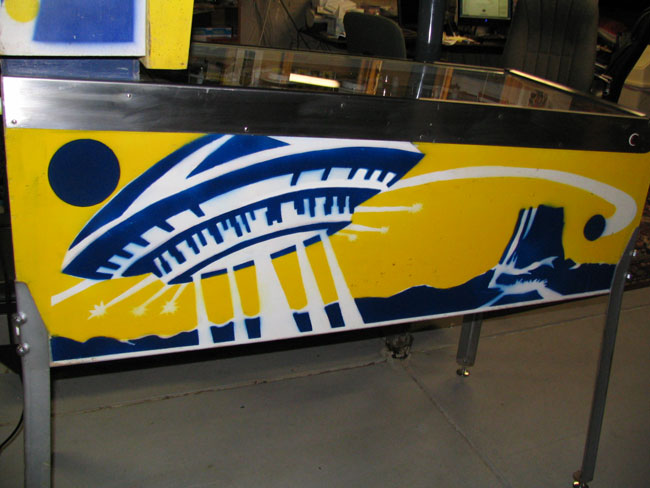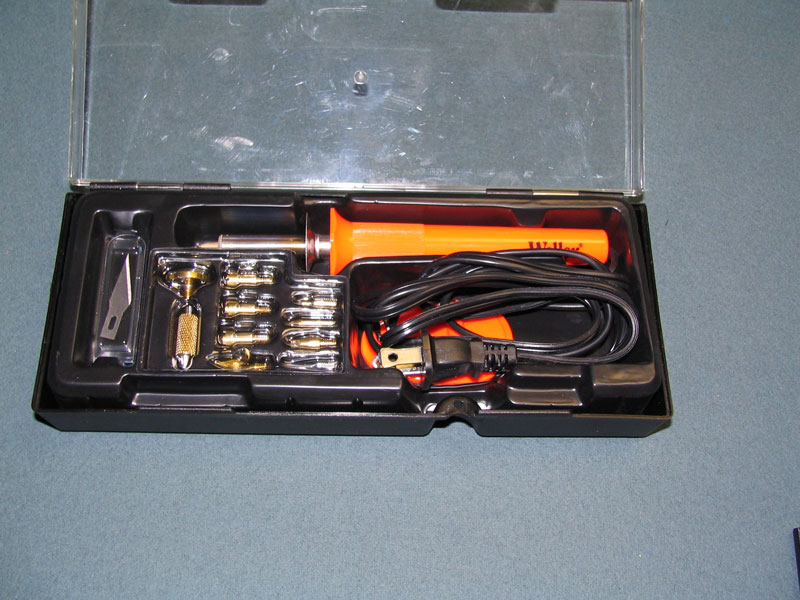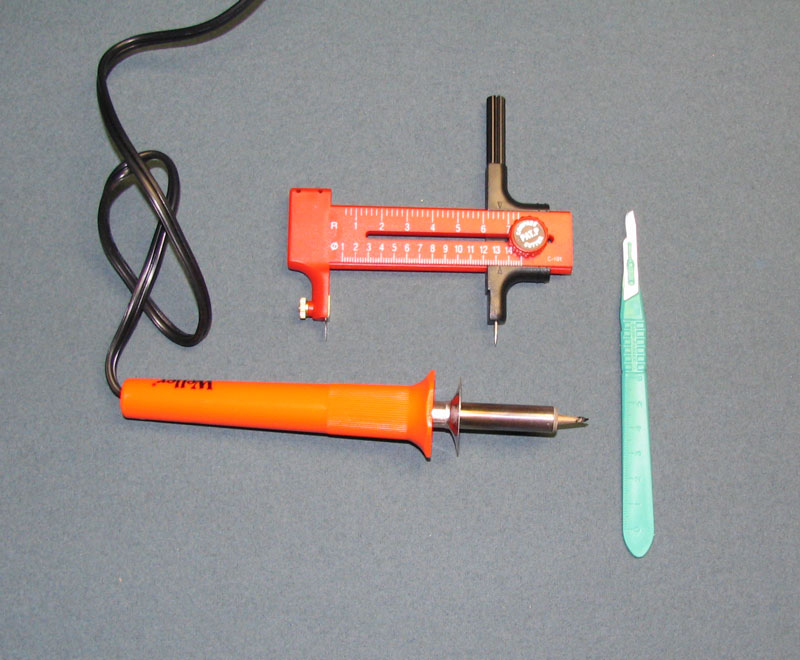
IntroI often get questions regarding creating stencils for painting a Pinball game cabinet, so I thought I'd document the basic process of what I do. Sometimes I don't have to reapply the colors for an entire cabinet and only for a damaged section, but this particular example is for a Close Encounters where some gouges occurred. The background color for Close Encounters is white. This is followed by yellow, then blue as the final color. How do you know which order to do the colors? You can tell by looking for overspray on the various colors. In the case of this game, I could see blue overspray on white as well as yellow overspray on white. This means that white was used as the base color coat since there is no white overspray on the blue or yellow areas of the game. You use the same technique to determine which color is the next color to apply. I could see blue overspray over the yellow, but there was no yellow overspray over blue (only white had yellow overspray), so this means that yellow was the second color the factory applied. Finally, that leaves blue as the last color to apply. BackgroundWhy is there overspray on the original cabinet colors? Because the factory made their stencils out of sheets of brass that were simply laid down on the cabinet (rather than being fastened to the cabinet) and the games were shot with a spray gun containing the color associated with the brass stencil. Since the brass stencil was only laying on the cabinet loosely, paint could shoot past the edges of the brass that weren't laying completely flat on the cabinet which would form an overspray. The base coat (first paint coat) was shot on the entire cabinet which happens rather quickly since there isn't a stencil involved. Just shoot the whole cabinet, let it dry, shoot the second color and let it dry, then the final color and let it dry (assuming there are only three colors which is pretty typical). They would use the artwork design and remove the brass for the particular color being applied. Since the stencil is made of brass, there wasn't a need to worry about sharp areas of the artwork curling up as you would find with using paper or cardboard. Just lay the stencil on the cabinet and shoot the paint color. It isn't uncommon to find what appears to be somewhat sloppy placement of the stencils when shooting the colors since this was done on an assembly line and the cabinet artwork isn't as fine as the playfield artwork so not that big of a deal. Once the stencils were created for one side of the cabinet, they could simply be flipped over for the other side of the cabinet to duplicate the same artwork. This means they didn't need brass stencils for both sides of the game. Just one stencil for each color for the same side of the game and flip it over when shooting the other side of the cabinet. They would make the stencils for just one side of the game, not use one color for the right side, then another color stencil for the other side. They created stencils that were supposed to line up correctly whether used on the right or left side of the cabinet. Stencil MaterialsWhat material could be used for making the stencils since brass is rather expensive for doing a single game? Some folks use wax paper, others use butcher's paper, and other materials such as plastic sheets, cardboard (from a cardboard box), mylar (thick or thin mylar), signage vinyl, Frisket, formica (using a router to cut out the artwork), etc. There are lots of materials you could use, but the key is to have a material that won't curl when paint is shot over it since that would pretty much ruin the artwork design. In the case of signage vinyl, a piece of vinyl is cut using a computer-controlled cutter with artwork software describing to the program where to cut the vinyl. The vinyl comes with a backing material that is removed and the vinyl has a light tacky material on one side to keep it adhered to the cabinet while spraying a color. You remove the backing and then use a squeegee to smooth out any bubbles underneath the stencil material. In this case, rather than using one piece of vinyl on both sides of the cabinet, they create two pieces of vinyl for each color. One stencil is used for the right side of the game, another duplicate piece of vinyl for the other side of the cabinet. So if you have a three color cabinet, you will have four stencils. Two stencils for one color, and two stencils for the other color with the base color not requiring a stencil. Is there a downside to using the vinyl stencils? Yes, and that is that the stencil artwork edge lines will be rather sharp instead of showing an overspray which would've been closer to what the factory produced. It is easier (although not cheap as in it's usually more than 100 bucks) to buy the vinyl, pull off the backing material, apply the vinyl stencil to the game and either shoot the paint with a spray gun or use a micro-roller to roll the paint on to the cabinet. Once the paint is dry (or somewhat dry so it won't pull off underlying paint), just pull off the vinyl stencil and throw it away and apply the next color stencil and repeat. So the vinyl stencil is easier to use, it's already precut, but it isn't cheap and will produce a sharp edge rather than overspray. You also can't reuse the vinyl stencils since they are meant to be tossed after shooting each color. If the vinyl is meant to be tossed, why is it so expensive (well, not THAT expensive)? Because someone needed to trace the original artwork colors and then transfer it to a program that is used by the computer to control the vinyl cutter. This takes time on the stencil seller's part and shouldn't be expected to be free. The actual cutting of the vinyl is rather fast when you see it in action, but the stencil seller invested in a cutter, perhaps a cutting program, and then there's the vinyl which doesn't come free. A large roll of vinyl is fed into the cutter and the computer tells the cutter where to cut as the material feeds through the cutter. The cutter looks more like an old plotter if you are old enough to have seen one in action. Steps For Creating A StencilI'll outline the steps below that I use for making a stencil. I like to use 5 mill to 7 mill mylar since it's heavy enough that it lays down pretty well on the cabinet, won't curl like paper products may do, and can be used multiple times on multiple games of the same title. I had a Close Encounters (technically, Close Encounters of the Third Kind, a System 1 game made by Gottlieb) that had a hefty gouge and some scrapes on both sides of the cabinet. Repairing the gouges and scrapes meant that I'd have to reshoot the artwork to cover the repairs. It was easier to make a stencil and match the colors for the existing artwork and blend such that it wasn't noticeable where the patches occurred. In my description below, you may read where I say that I made "cuts" with the cutting tool (a low wattage soldering iron with a fine point tip). The iron isn't actually cutting anything. What it does is melt through the mylar so that it looks like a cut was made. The "cut" will end up being almost 1/32nd wide, so you will want to take that into account when cutting the mylar. So here's what I did: 1. Cleaned the cabinet with Mean Green to remove any wax or dirt on the cabinet. Then used a clean sponge with water to wipe the game down followed by a clean T-shirt rag to dry it off. I also patched the gouges and scratches with body putty and a filler material (thin bondo). 2. Used some 3 foot by 4 foot sheets of 7 mill mylar as the stencil material. I bought the mylar from a signage business and it was about 2 bucks per sheet. Since Close Encounters has three colors, I needed to buy 2 sheets. One sheet each for the blue and yellow colors. The white color was the base color so it didn't need a stencil. 3. I laid the cabinet down on its side so it would be easier to trace the artwork. 4. I laid a sheet of mylar down on the cabinet and fastened it to the cabinet with blue painter's tape so it wouldn't move around while tracing the artwork. 5. I used a fine point black Sharpie to trace the edges of the artwork that would be used for the yellow color while also making some "index" marks that showed where it needed to be aligned on the cabinet. I drew an X in the areas where the mylar needed to be removed for the color. I also labeled the mylar with the word YELLOW so I would remember which stencil it was. In areas that wouldn't be removed, I labeled it with the other color (white or blue) that wouldn't be covered by the yellow paint. 6. Then I removed the yellow stencil and laid down another sheet of mylar to trace the blue artwork using the same technique as I used for the yellow artwork. Once I finished this, I laid the yellow mylar down, then the blue mylar tracing over that and checked to ensure the artwork lines I had traced lined up. By lining up, I mean that there wouldn't be any base color showing through the tracings between color edges. I found a few places that I had missed, so this was a good way to see those areas that needed to be traced for each color. 7. Once through with the tracings for the two colors, I installed an old playfield glass in a nearby game. I used an old playfield glass since I didn't want to scratch a better playfield glass while cutting the mylar. 8. I bought a "wood burning" kit from Sears that cost me a little under 20 bucks. The kit also includes a plastic cutting tip which was what I wanted for "cutting" the mylar. The "cutter" is basically a 25 watt soldering iron with a tip that meets the needs of what I was doing (cutting, i.e., melting, mylar using low heat). The tip has a rather fine point and when the iron is hot, will cut through the mylar like it's butter. The trick here is to "cut" along the Sharpie trace lines for a color using an even speed. The iron will cool somewhat as you trace over the Sharpie lines for the stencil so you have to take this into account as you trace along the lines. If you move the iron too fast, it won't completely cut through the mylar. If you move to slow, it will melt the mylar excessively and leave an edge that isn't very sharply defined. If you don't use an old playfield glass, you may see where the tip scratched the glass as you were cutting through the mylar. 9. I use a steel ruler that has a cork backing for the straight lines, and I use custom made "french curves" made of aluminum for various curves. I made my own french curves out of aluminum sheets similar to what offset printers use. I laid down a plastic french curve on the aluminum sheet and then traced it using a Sharpie. Then I used sharp heavy duty scissors to cut out the shapes. I then used a sanding block (foam rubber with an abrasive substance) to sand the edges smooth so I wouldn't cut myself. You can do it freehand if you can hold your cutting hand steady enough with the aid of your other hand to stabilize the cut, but where possible, I use the ruler or french curves to do the cuts. For artwork that contains circles, I made the mistake of first trying this using the iron, but later discovered that I could use a circle cutting Exacto tool with a "self-healing" mat under the mylar to keep from dulling the Exacto blade. Just find the center of the circle, push the sharp point of the circle cutter through the center of the circle (with the self-healing pad behind the mylar), and twirl it around while cutting out the circle. Very fast and leaves a nice circle. 10. With the tracings now complete for the yellow and blue colors, I used an airbrush with acrylic paint like you can buy in the small bottles at the hobby store. I had to cut the acrylic with a little bit of water so it would work with the airbrush since it was rather thick straight out of the bottle. I applied the base color (white) and let it dry. After it was dry, I shot it with a light coat of Krylon Crystal Glaze to seal it and to avoid lifting it when I applied the stencil for the other colors. 11. Next was to spray some light 3M tacky substance onto the back of the yellow stencil. Once I let that set up for a couple of minutes, I laid the yellow stencil down on the cabinet (remember, the game is laying on its side) and pressed it down on the cabinet. Then I used the color-matched yellow acrylic paint (also cut with water to thin it a little bit) and my airbrush to shoot the yellow color. Once it dried, I laid the blue stencil over it to ensure it would align correctly and not leave any base color (white) showing through the edges of the stencil. It didn't so I wiped the cabinet off to be sure there wasn't any sticky substance on the base color area (there wasn't) and then shot it with Krylon Crystal Glaze to seal it. 12. Next came the blue stencil which was similar to what I did for the yellow color. Once through with that and perhaps doing a couple of light touchups using dodging techniques (a scrap piece of mylar to stop paint from ending up where I didn't want it), I let it completely dry and then shot the side of the cabinet with a thicker coat of Krylon Crystal Glaze. This completely sealed the stencil colors so that the cabinet could be cleaned later without wiping off any of the paint I shot on the cabinet. This pretty much finished one side of the game. 13. I flipped the game over and repeated the same process on the other side of the game being sure to align the mylar such that areas of the original artwork would blend with the airbrush work I did with the stencils. Issues EncounteredThe main issues I encountered were as follows:1. Using an Exacto knife for cutting the mylar stencils was probably my biggest initial mistake. It was way too difficult to use an Exacto knife when cutting a stencil while using 7 mill Mylar. The Exacto knife would "wander" as I was cutting the thick mylar and on one long cut it pretty much ruined the piece of mylar I was using. I had purchased some extra mylar so I was able to recover from this mistake, but I decided right then that an Exacto knife was not the way to go when creating a stencil using mylar this thick. The hot iron cutting tool was much faster and much more accurate than what I could do with an Exacto knife. Can you still use an Exacto knife to cut the stencils? Sure you can, but after you use the vinyl cutter soldering iron type of tool I think you'll find that it is much easier. 2. Getting the speed of the cutting tool refined was probably the hardest once I started using the tool. I started cutting with the yellow stencil but should have tried practicing with a scrap piece of mylar that contained curves, straight lines, and fine detailed cutting. I caught on to my mistake rather quickly and practiced a bit on scrap pieces of mylar, but often found that I was moving the iron too fast which meant it wouldn't completely cut through the mylar. Turns out that if this happens all you have to do is bend the mylar back and forth in those areas and it will separate rather easily. Even still, it's better to get the cut done in one pass rather than re-working the cuts due to poor cutting (melting) speed control. 3. Mylar thickness was perhaps too much. I used 7 mill mylar which is rather thick, but I think 5 mill would've worked better based on some experiments with 5 mill mylar I did on a subsequent job. Having said this though, I discovered that the thicker mylar lays down better and would stay in position when airbrushing better as well. 4. Width of the cut can vary depending on how fast you move the iron along the Sharpie tracing lines. I would either move the iron too fast or too slow and would end up with material removed (by melting the mylar) that wasn't consistent. Sometimes I would have about 1/32nd of an inch removed, sometimes as much as 1/16th of an inch. By the time I got to the blue stencil, I had pretty much learned how fast I needed to move the iron across the mylar so the issue wasn't quite as bad. 5. There are some "star" areas in the artwork for Close Encounters that have a tendency to flip up or not lay down quite so flat. I needed to apply more of the 3M tacky spray for these areas to hold the tracing down a little better. I didn't realize this until after shooting the cabinet with my airbrush only to see the mylar flapping around and the stars looking rather blurry with a loss of detail. The good news is that since this is acrylic paint, all you have to do is use a wet sponge and wipe the paint off. There appeared to be a "trick" to how much 3M tacky spray to apply. Too little and the mylar wouldn't adhere very well and would lift up when spraying with the airbrush. I also found that I could use the end of a dowel to hold down the star areas with one hand while spraying with the other. Just be careful not to forget and lay the dowel down on the cabinet or the paint on the dowel will transfer to whatever you laid it on. 6. I found that while moving the iron upwards rather than downwards I would have inconsistent cuts. Cut the mylar by moving the iron from the top of the mylar downwards rather than cutting from the bottom up. 7. Irregular cuts near inside corners of the tracing. I used a scalpel (very sharp) and scissors to finish the cuts on inside corners so they would be better defined. When using the iron the inside corners of artwork would be rather rounded instead of a sharp corner. 8. Over-cutting an area isn't the end of the world. Just use tape to compensate for where too much cutting occurred. You'll need to put the tape on both sides of the mylar since you'll be painting on the other side of the cabinet as well. 9. Using the stencil on the other side of the cabinet can be hard to move around due to the 3M tacky material that was on the bottom of the stencil now being on the upside of the stencil. It kept sticking to my fingers making it hard to move it around while positioning the stencil. I fixed this by applying saran wrap to several places where I could use my fingers to reposition the mylar. The saran wrap stuck to the stencil (since the 3M sticky substance was now facing up after doing the previous side of the cabinet) and it made it a lot easier to maneuver the stencil. 10. Storing the stencil after doing one side of the cabinet. Since the 3M sticky material is on one side of the stencil, it has a tendency to want to stick to itself. I used some saran wrap on the sticky side to keep this from happening. Once it's time to do the other side of the cabinet, just pull the saran wrap off. 11. The original stencils used by the manufacturer wasn't that good. Some lines weren't very straight, some colors didn't intersect with other colors in correct alignment, and the artwork wasn't consistent in its shape. I copied what was there, but all that means is that I duplicated some of the shoddy work that was done when they shot the colors on the cabinet. If I was making a vinyl stencil I could've used software to align things correctly and tweak the artwork so that it was consistent. Even still, most people looked at the cabinet and wouldn't know that it had some pretty severe gouges that were fixed and the cabinet was retouched. 12. I had a bit too much overspray in some of the blue areas of the saucer. By the time I realized that the overspray was a bit much, I was pretty tired and thought that it wasn't that bad and wasn't worth all the extra work to remove the blue and shoot it again. I've seen much worse overspray on many of my games so I thought it was good enough and let it be. ConclusionMaking your own stencil isn't that hard if you do it using this technique. The biggest investment is buying the stencil, aligning it with the existing artwork (you may have to use both sides of the cabinet if one side of the cabinet is too messed up to get a good tracing), tracing the artwork for each color, and then cutting out the various stencils for each of the colors. So the work involved isn't trivial, but it also isn't rocket science. The method I used in this write-up requires an airbrush since it's a lot easier to use the airbrush rather than a roller which will cause paint to wick up under the mylar. You could also forget about the airbrush and just use a can of spray paint if you don't want to spend the money on an airbrush and compressor. My technique of cutting the mylar using an old playfield glass in a nearby game was something that I thought up since I needed to ensure I didn't melt what was behind the mylar when "cutting" out the stencil, and I needed something large since I was making a cabinet side stencil which is large in shape. You could bypass using the airbrush and use spray cans of paint. The only downside to spray cans is that you need a solvent to clean up mistakes and it's less easy to control than an airbrush (assuming you can figure out how to easily use an airbrush). Cheapy bottles of acrylic paint only cost about a buck, and I was able to do all the blue on both sides of the cabinet using only around a third of a bottle. I probably should've noticed that the original spray job by the manufacturer wasn't very good. I was so focused on tracing and duplicating what was there that I repeated the mistakes they had made. When I do another stencil job I will try to fix the mistakes the manufacturer made when stenciling the game. The mistakes are usually around not aligning the stencil properly. (click picture to enlarge)
|